When you’re diving into the world of game development or digital art, mastering a skin editor can unlock a plethora of possibilities for customizing characters, objects, and more within your projects. Whether you’re a beginner or an experienced developer looking to refine your skills, this guide aims to provide you with the essential knowledge and practical tips you need to succeed. This comprehensive guide will walk you through the fundamental principles and advanced techniques in using a skin editor efficiently. We’ll focus on addressing common pain points, providing real-world examples, and sharing actionable advice to elevate your game development experience.
Problem-Solution Opening Addressing User Needs
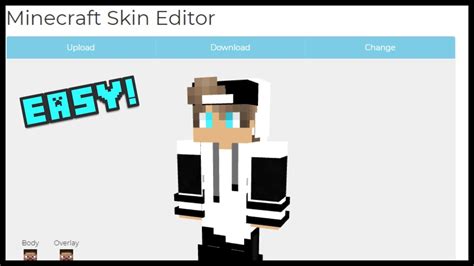
Welcome to the world of skin editing—a powerful yet sometimes complex tool in game development that enables users to personalize characters and objects. However, navigating through the intricacies of a skin editor can be daunting, especially for those new to the field. This comprehensive guide aims to demystify the process, offering step-by-step instructions, practical examples, and expert advice to help you unlock your full creative potential. Whether you are dealing with color discrepancies, texture alignment issues, or simply struggling to get the hang of the interface, this guide will equip you with the tools and knowledge to master skin editing effectively. Let’s dive in and transform those blank canvases into customized, captivating digital art pieces.
Quick Reference
Quick Reference
- Immediate action item: Start by importing your base texture into the skin editor to ensure you have a reference point for all your modifications.
- Essential tip: Utilize layer-based editing to maintain flexibility and make precise adjustments without affecting the underlying texture.
- Common mistake to avoid: Overlooking texture alignment can lead to inconsistencies; always double-check the alignment after making changes.
Getting Started: Basic Skin Editing
Before diving into complex modifications, it’s crucial to understand the basic functionalities of a skin editor. This section covers the fundamental steps for getting started and offers practical tips to build your confidence.
- First, install the skin editor of your choice. Many popular options include Blender, GIMP, and ZModeler. Choose one that fits your project requirements.
- Once installed, open your skin editor and create a new project. Navigate to the file menu and select “Import Base Texture” or a similar option to load your starting point.
- Your base texture should now appear on the canvas. Use the selection tool to pinpoint the area you wish to modify. This tool allows you to isolate specific parts of the texture for more detailed editing.
To ensure you maintain control and precision, use the grid function available in most skin editors. This feature helps you align your changes accurately, ensuring your customizations blend seamlessly with the original design.
Detailed How-To: Advanced Texture Editing
Once you’ve mastered the basics, it’s time to elevate your skills with advanced texture editing techniques. This section dives into complex modifications and provides in-depth, step-by-step guidance for achieving professional-quality results.
- Blending Modes and Opacity:
One of the most powerful features in any skin editor is the ability to manipulate blending modes and opacity levels. This allows you to layer different textures and colors in a way that mimics natural blending. For instance, you can use the “Overlay” blending mode to add subtle shadows or highlights, enhancing the depth of your design.
- Select the brush or paint tool.
- Choose your blending mode from the toolbar.
- Adjust the opacity slider to control how much of the original texture shows through the new layer.
- Retopology:
Retopology is the process of restructuring the topology of a 3D model to improve its mesh. This step is crucial for ensuring that textures apply smoothly without any stretching or distortion. In skin editors like Blender, you can use the retopology tool to create a new, optimized mesh that sits perfectly over your original model.
- In Blender, navigate to the “Edit Mode” and select “Retopology” from the toolbar.
- Use the retopology tools to create a new mesh that follows the contours of the original model.
- Once complete, apply the new mesh to your texture.
- UV Mapping:
UV mapping is essential for ensuring that your textures align correctly with the 3D model. This process involves unfolding the 3D model’s surface into a 2D plane where you can apply and edit the texture. In Blender, for example, you can use the UV Editing workspace to map your texture.
- Switch to the “UV Editing” workspace in Blender.
- Select the model and unwrap it using the “Smart UV Project” tool.
- Adjust the UV map to ensure that each part of the texture aligns correctly with the corresponding part of the model.
Practical FAQ
What common issues do people face when editing skins?
Many users encounter issues such as texture misalignment, color discrepancies, and difficulty in layer management. Texture misalignment often occurs when the UV map is not correctly aligned, leading to parts of the texture being stretched or compressed. Color discrepancies can happen due to incorrect blending modes or opacity settings. Lastly, managing layers can be confusing for beginners, but using layer-based editing helps maintain control and flexibility.
How can I avoid texture stretching or compression?
To avoid texture stretching or compression, ensure your UV map aligns correctly with the 3D model. This involves properly unwrapping the model and adjusting the UV coordinates. Use the “Seam” tool in Blender or similar features in other editors to create clean, non-overlapping UV segments. Additionally, regularly check your texture’s alignment in both the UV editor and the 3D view to make sure it looks consistent.
This guide has covered the essentials of skin editing, from basic steps to advanced techniques. By following these guidelines and tips, you’ll be well on your way to creating customized, professional-quality skins for your projects. Remember, practice makes perfect, so keep experimenting and refining your skills.