Many gamers out there use Minecraft skins to personalize their avatars and make their gameplay experience more enjoyable and unique. Minecraft skins can be a creative outlet, and having the right skin can even impact how other players interact with you in-game. This guide is designed to provide step-by-step guidance on how to navigate and utilize Minecraft skins effectively, addressing common user pain points along the way.
Understanding Minecraft Skins
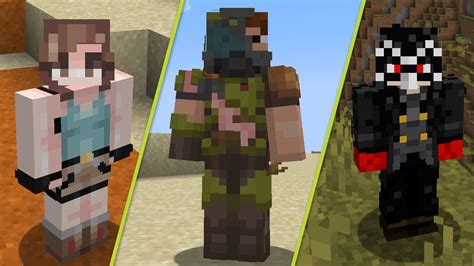
Minecraft skins are pixel-based images that alter the appearance of a player’s avatar in the game. Custom skins can be a form of self-expression, helping you stand out in the vast, blocky world of Minecraft. Whether you want a cool superhero skin, a funny animal, or a detailed character, the choice is yours. However, choosing, downloading, and applying skins might seem daunting if you are new to the process.
Problem-Solution Opening
If you’ve ever felt overwhelmed by the sheer number of skins available or struggled to apply the perfect skin to your Minecraft character, you’re not alone. Many gamers face challenges when looking to enhance their Minecraft experience through skins. Here’s the solution: a comprehensive guide that offers clear, practical steps to help you select, download, and apply the best skins to your Minecraft character. From avoiding common mistakes to unlocking advanced customization techniques, this guide will equip you with the knowledge to make the most of your Minecraft skins.
Quick Reference
- Immediate action item with clear benefit: Start by visiting a trusted Minecraft skin website like MinecraftSkins.com or Skindex.
- Essential tip with step-by-step guidance: To change your skin, navigate to the Minecraft settings, go to the skin tab, and upload your new skin file.
- Common mistake to avoid with solution: Avoid using excessively large or high-resolution images as they can lag your game. Always opt for appropriately sized images.
How to Select a Minecraft Skin
Selecting the perfect Minecraft skin involves balancing creativity with functionality. Here’s how to choose a skin that stands out without compromising your gaming experience:
- Define Your Style: Before diving into skin selection, determine the type of style you want for your avatar. Do you want something casual, thematic, or completely original? Here are a few categories to consider:
- Casual: Simple designs that are easy on the eyes.
- Thematic: Skins that match the current season, game updates, or popular cultural trends.
- Original: Unique designs that showcase your creativity.
- Use Reputable Sources: Always use trusted websites for downloading skins. This prevents you from downloading skins that could harm your computer:
- MinecraftSkins.com
- Skindex.mobskinz.net
- Minecraft Forum Skin Repositories
- Preview Before Downloading: Always preview the skin on the website before downloading to ensure it looks as intended and doesn't conflict with any current game settings:
- Zoom in and check the details.
- Look for the "Preview" button that allows you to see how the skin will look in-game.
- Check Skin Size: Remember that Minecraft has a standard size requirement for skins (64x32 pixels). Large files or those not fitting this aspect ratio might distort in-game:
- Ideally, use an image editor to resize and crop your skin to fit the 64x32 requirement.
- There are free tools online like GIMP or Pixilart that can help with this.
Downloading and Applying Minecraft Skins
Once you have your skin selected, the next step is downloading and applying it. Follow these steps to ensure the process is smooth:
- Download the Skin File: On the skin website, click on the "Download" button. This will typically save a PNG file to your computer:
- Ensure the downloaded file is named appropriately for easy identification.
- Save the file in a dedicated folder labeled “Minecraft Skins” for easy access later.
- Open Minecraft: Launch Minecraft on your computer. Once the game loads, proceed to the main menu:
- Navigate to Settings: Select the "Profile" tab to access your settings:
- If you’re in a game world already, press “Esc” to return to the main menu and then go to the settings.
- Select the Skin Tab: Click on the “Skin” tab to find your current skin. Here, you can change your avatar’s skin:
- You should see a preview of your current skin. Below this, you’ll find an “Edit” button.
- Upload Your New Skin: Click on the “Edit” button and then the “Upload” button. Here you’ll be prompted to select the downloaded skin file:
- Navigate to your Minecraft Skins folder, select the PNG file, and click “Open” to upload it.
- Once the upload is complete, your new skin should now appear in the preview.
- Save Your Changes: Click “Done” to save the new skin to your profile:
- You may need to return to the main menu to see the skin changes reflected.
Common Mistakes and How to Avoid Them
Mistakes can happen, and knowing how to avoid them can make all the difference:
- Using a Incorrect File Type: Some users mistakenly download skins as JPEG or GIF files instead of PNG files. Always ensure that the file is in PNG format for compatibility:
- Check the file extension before downloading. A PNG file will have a ".png" extension.
- Ignoring Skin Size Restrictions: Using excessively large or small images can lead to distorted or pixelated skins:
- Resize your skin to fit the 64x32 pixel dimension using an image editor.
- Avoid stretching the image to fit, as it may not look good.
- Not Checking Compatibility: Some skins might not be compatible with certain Minecraft versions. Always check the skin's version compatibility:
- Look for details on the skin website that indicate which Minecraft version the skin is compatible with.
- If in doubt, download skins from the official Minecraft website or reputable third-party sites.
How can I create my own Minecraft skin?
Creating your own Minecraft skin is a fun and creative project! Here’s how you can do it:
- Choose a Design Tool: Use an online tool or software like Pixilart or Paint.NET to design your skin:
- These tools offer user-friendly interfaces and templates that make the process straightforward.
    <li><strong>Design Your Skin:</strong> Create a 64x32 pixel image. Use the grid provided by your design tool to ensure your design fits well within the square:</li>
    <ul>
      <li>Start with a base color or template and build up your design layer by layer.</li>
    </ul>

    <li><strong>Save Your Design:</strong> Once you’re satisfied with your design, save it as a PNG file:</li>
    <ul>
      <li>Ensure the file size is within the recommended limits to avoid performance issues.</li>
    </ul>

    <li><strong>Upload to Minecraft:</strong> Follow the same steps as outlined in the previous sections to upload your new skin to