If you’re an avid gamer using the Steam Deck and need to capture your gaming moments, you’re in the right place. Capturing screenshots is a handy feature, allowing you to share impressive moments from your games or save your progress. Here, we’ll delve into the step-by-step process to take screenshots on your Steam Deck, providing practical solutions to common issues you might encounter.
Introduction: Why Taking Screenshots Matters
Screenshots are more than just images; they are keepsakes of your gaming experiences, documentation of achievements, and a means to communicate within gaming communities. Whether you want to showcase your latest high score, capture tricky game mechanics for future reference, or share epic gameplay moments, knowing how to take screenshots efficiently on your Steam Deck can significantly enhance your gaming experience.
Quick Reference
Quick Reference
- Immediate action item with clear benefit: Press the "Steam" and "Volume Down" buttons simultaneously to capture a screenshot.
- Essential tip with step-by-step guidance: To view and manage your screenshots, access the Steam Deck’s library and open the "Screenshots" folder.
- Common mistake to avoid with solution: Ensure that Steam OS is up-to-date to prevent any malfunctions in screenshot capturing. Regularly check for updates via the Steam Deck settings.
Detailed How-To Sections: Capturing Screenshots on Steam Deck
Step-by-Step Guide to Taking Screenshots
Capturing screenshots on the Steam Deck is straightforward but crucial to master for any gaming enthusiast. Here’s a comprehensive guide to ensure you’re taking screenshots without a hitch:
Step 1: Power Up Your Steam Deck
First, make sure your Steam Deck is fully charged or connected to a power source. A dead battery could be a distraction when you’re trying to capture that perfect frame.
Step 2: Boot Up Your Game
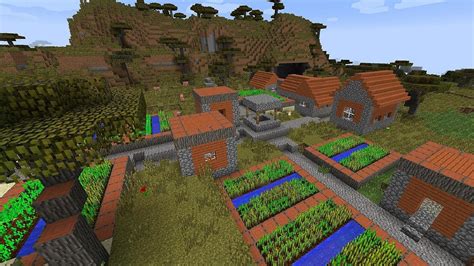
Navigate to the game you wish to capture moments from. Whether it’s a high-octane shooter or a deep RPG, find yourself in the right place for that epic screenshot.
Step 3: Capture the Moment
Simultaneously press the “Steam” button (the button with the orange Steam logo) and the “Volume Down” button. This combination will trigger the screenshot function. You’ll know it’s worked as you’ll hear a shutter sound, and a notification will pop up briefly.
Step 4: Locate Your Screenshot
Once you’ve captured a screenshot, you can find it quickly through Steam’s built-in screenshot management system. Here’s how:
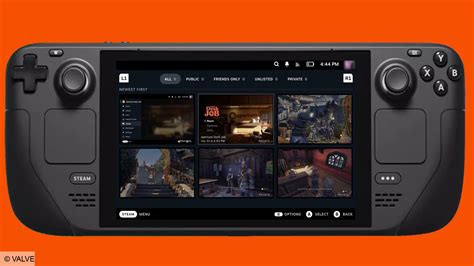
- Open the Steam Deck’s main menu and navigate to “Library.”
- On the bottom left of your screen, you’ll see a folder icon. Click on it to open “Collections.”
- Select the “Screenshots” folder. This folder will contain all the screenshots you’ve taken from any game on your Steam Deck.
Step 5: Manage and Share Your Screenshots
Now that you have your screenshots stored, you might want to share them with friends or upload them to social media. You can easily manage and share your screenshots as follows:
- Open the “Screenshots” folder.
- Navigate to the screenshot you want to share.
- Right-click (using the trackpad or external mouse) on the image file.
- Select the “Copy to SD Card” option if you want to move it to an external storage device.
- To share, you can upload the screenshot directly to social media platforms, email it, or send it via chat applications.
Troubleshooting Common Issues
Even the best setup can run into problems, but don’t worry – we’ve got solutions for the most common issues you might face while taking screenshots on your Steam Deck:
- Screenshot Not Capturing: If the screenshot is not capturing, make sure you’re pressing both buttons simultaneously and correctly. It can sometimes help to re-calibrate your buttons by going to the Steam Deck settings and performing a quick test.
- Blurry Images: Blurry screenshots often indicate a quick move or an unstable device. Slow down, and try to hold the Steam Deck steady during the capture process.
- Storage Issues: If you’re running low on storage space, consider moving old screenshots to an external drive or cloud storage to free up space.
Practical FAQ: Addressing User Pain Points
Can I edit my screenshots directly on the Steam Deck?
The Steam Deck doesn’t have a built-in screenshot editing tool, but you can easily edit your screenshots on your PC. You can transfer screenshots from the Steam Deck to your computer using USB transfer or cloud storage, and then use software like Adobe Photoshop or even simpler tools like Paint to edit them.
How can I set a shortcut for screenshot capturing?
Unfortunately, the Steam Deck does not currently support assigning custom shortcuts for screenshot capturing. However, the default “Steam” + “Volume Down” combination is optimized for ease of use, so it's best to memorize this key combination. If you often need to take screenshots, you might consider investing in an external device or peripheral that can map screenshot functionality to an accessible button.
Will future updates change the screenshot capture method?
Steam and Valve frequently update the Steam Deck to improve functionality and user experience. While current methods for capturing screenshots are straightforward, future updates may introduce new or additional capture features. To stay informed about these changes, regularly check for updates and community forums for the latest news and tips.
By following these steps, tips, and solutions, you can efficiently capture and manage screenshots on your Steam Deck, turning any gaming moment into a keepsake or a piece of evidence to share with your gaming friends. Happy gaming!