Welcome to the ultimate guide on making the awkward potion in Minecraft! If you’ve ever found yourself in the middle of a wild adventure where potion-making is your primary source of survival and advancement, then you’ve come to the right place. This comprehensive guide will take you step-by-step through the entire process, providing you with actionable advice, real-world examples, and tips to ensure you can brew the awkward potion with ease and confidence. Let’s dive in and unlock the mysteries of potion-making!
Understanding the Awkward Potion in Minecraft
In Minecraft, potion-making is an art that combines a variety of ingredients to create brews that provide useful effects. Among these, the awkward potion stands out for its slightly different approach and unique flavor. To start with the basics, the awkward potion requires Nether Wart, a unique ingredient found in Nether biomes. Nether Wart is essential as it serves as the base for many potions, including the awkward one.
Why the Awkward Potion Matters
Potions enhance your gameplay in numerous ways, offering everything from extended health to increased strength and even resistance against environmental hazards. The awkward potion is particularly intriguing because it forms the basis for a few other powerful potions. Once you master making the awkward potion, you’ll have a crucial step in creating complex brews.
Quick Reference
Quick Reference
- Immediate action item: Gather Nether Wart from the Nether and blaze powder from fortresses.
- Essential tip: Use a cauldron to brew potions, ensuring water and air flow to maximize efficiency.
- Common mistake to avoid: Forgetting to add gunpowder to finalize the potion; it’s critical for the brewing process.
Step-by-Step Guide to Make the Awkward Potion
Gathering Your Ingredients
Before you can start brewing, you’ll need to gather specific ingredients. Here’s a detailed look at what you’ll need:
- Nether Wart: Found abundantly in Nether biomes, particularly in bastion remnants and Nether wastes.
- Water Bottles: Crafted using a bottle and water from any source.
- Blaze Powder: Obtained from blaze rods, which drop when you defeat blazes found in Nether fortresses.
- Gunpowder: Easily found in chests across different biomes or obtained by smelting dry bones.
Collecting Nether Wart
Step 1: Enter the Nether
To collect Nether Wart, you must first enter the Nether. Be prepared for a hostile environment filled with lava lakes and hostile mobs.Step 2: Locate Nether Wart
In the Nether, look for Nether Fortresses or Bastion Remnants. These structures are abundant in Nether Wart, often found on top of these structures or within their lower levels.Step 3: Mine the Nether Wart
Use a sword to harvest Nether Wart. It grows on soul sand, so look for patches in these biomes. Nether Wart can grow up to three stacks, so be thorough.Step 4: Return to the Overworld
Once you’ve gathered sufficient Nether Wart, head back to the Overworld with your loot.Collecting Blaze Powder
Step 1: Find a Nether Fortress
Blaze rods are found in Nether fortresses. Equip yourself with armor and weapons to combat the blazes you’ll encounter.Step 2: Defeat Blazes
Blazes float in the air and shoot fireballs at you. Use a sword to kill them. They drop blaze rods which can be smelted into blaze powder.Step 3: Smelt Blaze Rods
Place the blaze rods in a furnace with any fuel to obtain blaze powder.Preparing Water Bottles
Step 1: Obtain a Bottle
Get a bottle from your inventory. If you don’t have one, craft it using a crafting table and three glass blocks.Step 2: Fill Bottles with Water
Use a bucket to draw water from any source in the Overworld or the Nether. Pour the water into the bottle to create a water bottle.Brewing the Awkward Potion
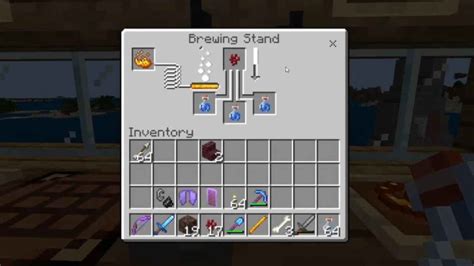
Step 1: Set Up Your Brewing Stand
Place the brewing stand in your base. To craft it, you’ll need three blaze rods and eight cobblestones.Step 2: Add Water to the Brewing Stand
Use the water bottle to fill the top fuel area of the brewing stand.Step 3: Insert Nether Wart
Place the Nether Wart in the brewing area. This will create a base potion, but it will appear as ‘awkward’ due to its appearance in the game.Step 4: Add Gunpowder
Finally, add gunpowder to the brewing stand. This step is crucial to complete the brewing process and finalize the awkward potion.Using the Awkward Potion
Once you’ve successfully brewed the awkward potion, you can utilize it to create more advanced potions or even as a base for various potion recipes.
Practical FAQ
How do I maximize my Nether Wart yield?
To maximize Nether Wart yield, explore bastion remnants thoroughly and look for nether wastes plains where Nether Wart is more abundant. Use fortune-enchanted tools if available to increase your mining efficiency.
What if I can’t find blaze rods in fortresses?
If you struggle to find blaze rods, consider exploring additional Nether fortresses or trading with piglins. Piglin barters can also be an alternative source of blaze rods.
Can I use other potion ingredients with the awkward potion?
Yes, the awkward potion can be used as a base to create other potions. For example, you can add redstone to turn it into a potion of weak potion, and then further enhance it by adding nether wart again to achieve stronger effects.
Best Practices and Tips for Potion Brewing
Here are some best practices and tips to help you excel in potion brewing:
- Organize Your Base: Set up your brewing area with multiple brewing stands, cauldrons, and storage for easy access.
- Enchantment: Enchant your pickaxe with Fortune to maximize resource yield from Nether biomes.
- Experiment: Don’t be afraid to experiment with different ingredients and potion combinations. This is the best way to discover new and powerful brews.
- Safety: Always carry armor and weapons when venturing into the Nether. The environment is hazardous, and you’ll need to be prepared for mobs.
By following this guide, you’ll be well on your way to mastering the art of potion brewing in Minecraft. The awkward potion may seem small, but it’s a powerful step in your journey to becoming a potion-making expert. With each potion you brew, you’ll gain more knowledge and skills, leading to more advanced and powerful potions. Happy brewing!