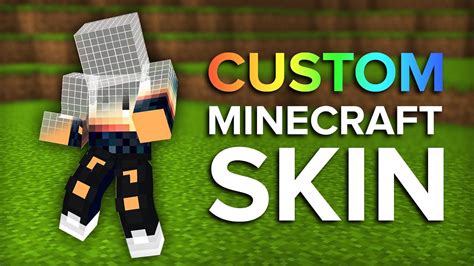
If you’re looking to personalize your Minecraft experience, getting Minecraft skins is a fun and straightforward way to make your avatar unique. Whether you’re drawn to elaborate designs or simple, clean profiles, the variety in Minecraft skins is vast. Let’s delve into how you can navigate the process with step-by-step guidance, practical tips, and common pitfalls to avoid.
The Challenge of Finding the Perfect Minecraft Skin
Navigating through the myriad of Minecraft skins can be daunting. You might encounter confusing websites, poor quality skins, or lack of customization options. This guide aims to simplify this process by breaking down each step into manageable parts. We’ll address user pain points like choosing the right skin, ensuring compatibility, and understanding how to implement them. With actionable advice and real-world examples, we’ll help you pick, customize, and apply skins to elevate your gaming experience.
Quick Reference
Quick Reference
- Immediate action item: Visit Minecraft’s official skin customization site.
- Essential tip: Use a high-resolution image (512x512 pixels) for the best quality.
- Common mistake to avoid: Using overly complex designs that affect gameplay due to pixelation.
Step-by-Step Guide to Getting Minecraft Skins
Let’s walk through the process from selecting to applying the skin you want on your Minecraft avatar.
Step 1: Choosing a Minecraft Skin
When it comes to choosing a skin, you have multiple avenues:
- Minecraft Marketplace: This is the official skin store where you can purchase skins directly from Mojang Studios. You’ll find both free and paid options.
- Custom Skins: Websites like minecraftskinstealer.com and skull.land offer a vast library of free skins that you can either download and upload.
- Social Media and Forums: Platforms like DeviantArt, Reddit, and Minecraft forums are treasure troves for custom-made skins created by other players.
Picking a skin involves ensuring it’s high-quality (preferably 512x512 pixels) and something you genuinely like, as it will represent you in the game for a while.
Step 2: Downloading Your Chosen Skin
Once you’ve selected a skin, downloading it is simple:
- Navigate to the skin website hosting the skin you want.
- Locate the “Download” button, typically an arrow or cloud icon, and click it. The skin will usually download as a PNG file.
- Save the file in a location on your computer that’s easy to remember.
Always ensure the skin you’re downloading is legal and appropriate for your game environment.
Step 3: Uploading the Skin to Minecraft
With the skin downloaded, it’s time to upload it:
- Open Minecraft and go to your profile settings. If you don’t have a Minecraft account, you’ll need to create one.
- Navigate to the “Edit Profile” section and then select “Choose New Skin”.
- Instead of browsing for a skin from Mojang’s selection, choose “Custom image” and upload the PNG file you saved earlier.
- Adjust the skin’s dimensions if necessary to ensure it fits properly.
After uploading, make sure to save the new skin under a name that you’ll easily recognize.
Advanced Customization Techniques
For those looking to go beyond the standard Minecraft skin, here are advanced techniques for custom skins:
Using Skin Editors
Several online and offline tools can help you create more detailed and customized skins:
- Tydus Skin Editor: This is an offline editor that allows you to create, edit, and save skins as PNG files. It’s available for Windows, Mac, and Linux.
- Pixlr Editor: An online graphic editor that’s accessible via web browsers. It’s particularly useful for fine-tuning skins with tools like layers and brush options.
For beginners, starting with basic shapes and patterns can help build familiarity with the editor’s interface and tools.
Integrating Texture Packs
Texture packs can alter not just the skin but the entire block style of Minecraft, creating a more immersive experience:
- Download a texture pack from a reputable site like Planet Minecraft.
- Place the downloaded .zip file in your Minecraft texture packs folder (“%appdata%/.minecraft/texture packs/”).
- Open Minecraft, and you’ll see the new texture pack available in your list. Enable it and start playing.
Ensure the skin and texture pack are complementary to avoid conflicts and achieve the desired aesthetic.
Troubleshooting Common Issues
Even with all the steps laid out, problems can arise. Here’s how to tackle some common issues:
Skin Won’t Upload
If your skin isn’t uploading:
- Check the image size. Ensure it’s 512x512 pixels.
- Confirm the file type is PNG. Other formats might not be supported.
- Clear your browser cache if you’re using an online editor or site for uploading.
Skin Looks Pixelated
Pixelation often happens with low-resolution images:
- Use a high-resolution skin image (ideally 512x512 pixels).
- If editing, make sure to work on a larger canvas and scale down carefully.
- Avoid overly complex designs that may not translate well to Minecraft’s pixel format.
Texture Pack Conflicts
If texture packs and skins conflict:
- Disable one or both to identify the problematic one.
- Check for texture overwriting issues within the pack.
- Look for updated versions of packs or skins that better support your game version.
Practical FAQ
How can I make sure my skin looks good on different Minecraft versions?
Minecraft skins are generally backward-compatible, but certain versions may render the skin differently. Here’s what you can do:
- Always use high-resolution images (512x512 pixels) to minimize pixelation.
- Test the skin on different versions if possible. Many online skin editors offer preview functionality.
- Focus on simple, clean designs that are less prone to rendering issues across different versions.
While the core design should stay intact, minor adjustments might be necessary for optimal appearance.
By following this guide, you’ll be well-equipped to navigate the world of Minecraft skins, from simple downloads to advanced customizations. Remember, the key to a great skin is not just about aesthetics but ensuring it works seamlessly with your gameplay. Enjoy making your Minecraft avatar uniquely yours!