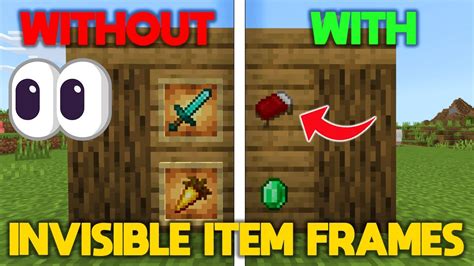
Building in Minecraft is a fun and creative way to express your imagination, but sometimes it requires attention to specific details to make your structures look just right. One of these essential details is the item frame, a versatile in-game block that allows you to hang items, armor, maps, or banners on walls to enhance the aesthetics of your builds. This guide will walk you through the process of making item frames in Minecraft, addressing common user needs and providing practical solutions to help you get started. Whether you’re a novice or an experienced builder looking to refine your skills, this comprehensive guide will equip you with everything you need to know about item frames in Minecraft.
Introduction to Item Frames in Minecraft
In Minecraft, item frames are a valuable addition to any builder’s toolkit. They serve multiple purposes: they can display armor, weapons, maps, and banners in a visually appealing manner, add decorative elements to your builds, or even act as a part of redstone mechanics. This guide will cover everything from the basic creation of item frames to advanced placement techniques. By the end of this guide, you’ll not only know how to make an item frame but also understand how to use it effectively to enhance your Minecraft creations.
Problem-Solution Opening Addressing User Needs
One common challenge many Minecraft players face is figuring out how to properly use and display item frames. Without proper knowledge, you might find yourself struggling with positioning and securing the frames, leading to a less-than-satisfactory end result. This guide addresses these issues head-on by providing a step-by-step approach to making and using item frames. From crafting the frames to placing them correctly, we’ll offer detailed instructions to ensure your displays look as intended. We’ll also cover troubleshooting tips to avoid common mistakes, helping you to master item frame use in no time.
Quick Reference
- Immediate action item with clear benefit: To craft an item frame, simply place two sticks and one wood plank in a crafting grid.
- Essential tip with step-by-step guidance: Learn to orient your item frames correctly by understanding how they mimic the rotation of the item placed inside them.
- Common mistake to avoid with solution: Ensure that item frames are placed on solid blocks to avoid them falling. Double-check for any overhangs that might cause instability.
How to Craft an Item Frame
Creating an item frame is straightforward but crucial for any decorative projects. Follow these steps to craft an item frame:
- Open your Crafting Table: Right-click on the crafting table to open the 3x3 crafting grid.
- Place the Ingredients: In the crafting grid, arrange the items as shown below:
1 Wood Plank 2 Sticks 1 Wood Plank - Collect your Item Frame: Once you have placed the items correctly, the item frame will appear in the result box of your crafting grid. Drag it into your inventory.
That’s it! You now have a crafted item frame ready to be used in your builds.
Advanced Crafting Tips
While the basic method for crafting an item frame is simple, there are advanced techniques to consider if you’re looking to streamline your process or improve efficiency:
- Batch Crafting: You can craft multiple item frames at once by filling the entire 3x3 grid with the required ingredients, producing nine item frames at a time.
- Using a Crafting Station: For large projects, use a larger crafting station like a furnace or a crafting bench with a 2x2 grid. It allows you to quickly prepare multiple item frames with less mouse movement.
- Automating Crafting: In more advanced gameplay, you can automate the crafting process using dispensers and hoppers to feed items directly into the crafting grid, saving time and effort.
How to Use an Item Frame
Once you have crafted an item frame, you’ll need to understand how to use it effectively in your Minecraft builds. Here’s a detailed guide to placing and orienting item frames:
- Select and Hold the Item Frame: In your inventory, select the item frame and hold it in your main hand.
- Place the Item Frame: Right-click on the block where you want to place the item frame. Make sure the frame is oriented correctly; item frames mimic the rotation of the item they hold.
- Place an Item Inside: After placing the item frame, it will turn gray to indicate it’s ready to hold an item. Hold the item you want to display in your main hand, and right-click the item frame. The item will be placed inside the frame.
- Adjust Orientation: The item inside the frame will follow the frame’s orientation. You can rotate the frame to display the item at the desired angle.
It’s important to note that item frames can only be placed on solid blocks or other item frames, which allows for interesting layering and stackable display options.
Advanced Placement Techniques
For those looking to take their displays to the next level, here are some advanced techniques for placing and using item frames:
- Layered Displays: You can stack item frames on top of each other to create a multi-level display. Each frame can hold a different item or even another frame.
- Inward and Outward Facing: To create a more complex display, use a combination of inward and outward-facing frames. This technique allows for a three-dimensional look and can hide frames behind other frames.
- Creative Redstone Integration: Combine item frames with redstone mechanics for dynamic displays that change based on player actions or game conditions.
Can I rotate an item frame after placing it?
Yes, you can rotate an item frame after placing it by using a written book or another item to interact with it. This will adjust the orientation of the item inside the frame.
What happens if I place an item frame on an unstable surface?
If you place an item frame on an unstable surface like a leaf block or water, it will eventually fall and disappear. Always ensure that item frames are placed on solid, non-interactable blocks to prevent them from falling.
How do I remove an item from an item frame?
To remove an item from an item frame, you can simply right-click on the frame while holding an empty hand. The item will be returned to your inventory, and the frame will revert to its gray, empty state.
In conclusion, mastering item frames in Minecraft can greatly enhance your building and decorative projects. With this guide, you now have all the information you need to craft, place, and use item frames effectively. From basic crafting to advanced placement techniques, you’re equipped to create stunning and intricate displays that will impress your friends and make your builds stand out. Happy crafting!