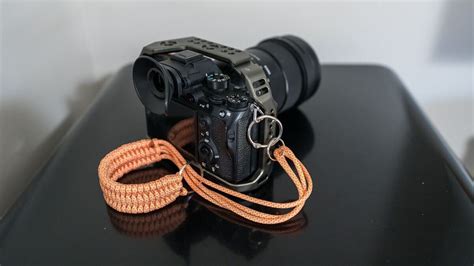
Welcome to the ultimate guide for mastering the art of taking stunning photos with your Creamsicle Camera! Whether you’re a photography novice or an experienced enthusiast, this guide aims to provide step-by-step guidance, actionable advice, and real-world solutions to enhance your photographic journey. Let’s dive in and transform your photos from ordinary to extraordinary!
The Challenge: Taking Stunning Photos with Your Creamsicle Camera
Taking photos with your Creamsicle Camera can sometimes feel like navigating a maze of settings and features. It’s easy to get lost in the settings menu, and the plethora of options can be overwhelming. The result? Great potential photos marred by missed opportunities or poor execution. This guide will walk you through every step to ensure that you're not just taking pictures—you're creating masterpieces!
Problem-Solution Opening
Imagine you're outside at a beautiful park, capturing your surroundings with your Creamsicle Camera, only to find that your photos are bland or overexposed. You want to capture vibrant, crisp, and stunning images but find yourself stuck with washed-out colors, blurred backgrounds, or photos that lack depth. This is a common struggle for many users, but the solution lies in understanding and applying the right settings, techniques, and tips specific to your Creamsicle Camera. This guide is designed to take you from basic understanding to expert photographer status, helping you tackle these issues head-on.
Quick Reference
- Immediate action item with clear benefit: Start by switching to manual mode to have full control over your camera settings.
- Essential tip with step-by-step guidance: Learn to use aperture settings to control the depth of field in your photos.
- Common mistake to avoid with solution: Don’t forget to check and adjust your ISO setting to avoid grainy photos in low light.
Mastering Aperture Settings
Aperture is one of the three critical pillars of photography (the others being shutter speed and ISO). Aperture controls the amount of light that enters your camera through the lens and also plays a significant role in the depth of field of your image. Understanding how to use aperture can drastically improve the quality of your photos.
Here's a detailed guide to mastering aperture settings on your Creamsicle Camera:
What is Aperture?
Aperture refers to the opening in a camera lens through which light travels to reach the camera sensor. The size of this opening is measured in f-stops. A lower f-stop number means a larger aperture, allowing more light to hit the sensor, while a higher f-stop number indicates a smaller aperture, letting less light in.
How to Adjust Aperture
To adjust the aperture on your Creamsicle Camera, follow these steps:
- Switch to Manual Mode: Most advanced settings are available only in manual mode. Press the mode button until you’re in manual mode.
- Locate the Aperture Dial: Depending on your model, this could be a physical dial or a digital option in the menu. Locate and adjust this to your desired f-stop.
- Experiment with Different Apertures: Start with a lower f-stop (f/2.8) to allow more light and create a shallow depth of field (less background blur). Then, try higher f-stops (f/8, f/16) to maximize the depth of field, ensuring everything from foreground to background is sharp.
It’s important to understand the impact of aperture on your photos. A lower f-stop is great for portraits where you want the subject in sharp focus and the background blurred, creating a professional and appealing look. Higher f-stops are excellent for landscape photography where you want everything in focus from the foreground to the horizon.
Understanding Shutter Speed
Shutter speed is another fundamental aspect of photography. It controls the duration of time your camera sensor is exposed to light. Adjusting the shutter speed affects not just the exposure but also the sharpness of your image.
Here's how to understand and adjust shutter speed:
What is Shutter Speed?
Shutter speed is the length of time the camera’s sensor is exposed to light when taking a photograph. Faster shutter speeds freeze motion (good for sports or wildlife), while slower shutter speeds capture motion blur (excellent for creative shots or low-light environments).
How to Adjust Shutter Speed
Follow these steps to adjust your shutter speed:
- Switch to Manual Mode: If you’re not already in manual mode, switch to it for full control over your settings.
- Locate the Shutter Speed Dial: Find the shutter speed dial or option in the menu.
- Experiment with Different Speeds: For fast-moving subjects, try a faster shutter speed (e.g., 1/1000s). For motion blur effects, use slower speeds (e.g., 1/30s).
- Adjust Based on Lighting Conditions: In bright sunlight, use faster speeds to avoid overexposure. In low light, slower speeds can help capture more light but may require a tripod to avoid blur from camera shake.
By mastering both aperture and shutter speed, you’ll have a powerful toolkit for creating the desired effect in your photographs.
Leveraging ISO Settings
ISO settings control your camera's sensitivity to light. A lower ISO number means less sensitivity to light and a cleaner, noise-free image. Higher ISO numbers increase sensitivity, which is useful in low-light situations but can add noise to your photos.
Here’s how to understand and adjust your camera’s ISO settings:
What is ISO?
ISO is a measure of a camera's sensor's sensitivity to light. Lower ISO values (e.g., 100 or 200) are ideal for well-lit conditions. Higher ISO values (e.g., 800, 1600, or higher) are necessary in low-light settings but can introduce noise into the photo.
How to Adjust ISO
Here are the steps to adjust ISO settings on your Creamsicle Camera:
- Switch to Manual Mode: Ensure your camera is in manual mode for full control.
- Locate the ISO Dial: Find the ISO adjustment option either on the dial or in the menu.
- Experiment with Different ISOs: Start with a low ISO (e.g., 100) in bright conditions for clear images. For low-light scenarios, gradually increase the ISO (e.g., 800, 1600) until you achieve proper exposure.
- Balance ISO and Other Settings: Higher ISOs will require compensating with lower aperture (f/stop) and slower shutter speeds to maintain proper exposure.
Understanding and adjusting ISO will help you balance exposure and image quality effectively.
Practical FAQ
How do I reduce camera shake?
Camera shake can blur your photos, especially in low-light conditions where slower shutter speeds are necessary. Here are some tips to reduce camera shake:
- Use a Tripod: A stable tripod keeps your camera steady and is essential for long exposures.
- Enable Image Stabilization: If your Creamsicle Camera has an image stabilization feature, turn it on for less shake in handheld shots.
- Increase Shutter Speed: In manual mode, use a faster shutter speed to avoid blur.
- Stabilize with Support Surfaces: Rest your camera against a wall, tree, or other stable surface to steady it.
By incorporating these practices, you can significantly reduce the occurrence of camera shake and ensure sharper photos.
By understanding and mastering