Minecraft is a game that never fails to surprise its players with new and exciting additions. One of these features is the art system, which includes paintings. Understanding the ins and outs of Minecraft paintings can significantly enhance your gaming experience, whether you’re looking to decorate your base or display trophies of your adventures. This guide will walk you through everything you need to know about Minecraft paintings, providing practical examples, actionable advice, and solving common user pain points.
This guide is designed to offer step-by-step guidance with actionable advice, real-world examples, and a conversational expert tone that's accessible to all players. It focuses on solving the common issues players face with Minecraft paintings, providing tips, best practices, and detailed instructions to help you master this feature.
Understanding Minecraft Paintings: Your Comprehensive Guide
Minecraft paintings are pieces of artwork you can hang on the walls of your in-game structures. There are twelve different paintings in the game, each representing famous artwork or monuments from around the world. The beauty of these paintings lies in their ability to enhance the aesthetic appeal of your builds and offer an interactive way to display memorable moments from your gameplay. However, understanding how to obtain, use, and display paintings in Minecraft can sometimes be confusing.
Quick Reference
Quick Reference
- Immediate action item: To obtain a painting, you need to first find an empty wall space where you can place it.
- Essential tip: Use an anvil to rename your painting to make it easier to identify. This can be particularly useful if you're carrying multiple paintings.
- Common mistake to avoid: Failing to check if a wall is valid for hanging a painting can lead to placement issues. Ensure that the wall space is large enough and properly aligned.
Starting from the basics and gradually progressing to more advanced tips, this guide will cover everything you need to know about Minecraft paintings.
How to Obtain Minecraft Paintings
Paintings in Minecraft can be obtained in several ways, and understanding these methods is crucial for effectively incorporating them into your builds. Here’s a detailed step-by-step guide on how to obtain different paintings:
Dropped by NPCs: The most common way to get paintings is by trading with villagers. You can trade various items, including emeralds, with villagers to receive different paintings.
Here’s how to get started:
- Locate a village with a trading hall. You can find villages during your explorations.
- Approach a villager who specializes in trades (like a librarian or an armorer) and offer items in exchange for a painting.
Loot from Chests: Paintings can also be found in various chests scattered throughout the world. Look for dungeon chests, village chests, and shipwreck chests:
- Explore dungeons for dungeon chests.
- Check village buildings like libraries, temples, and blacksmiths for village chests.
- Search shipwrecks or shipwreck temple chests for ocean-related paintings.
Crafted Paintings: Some paintings are craftable using items you gather during your adventures. Here’s how to craft some of the more common paintings:
- To create a canvas: Place a leather in a crafting table with four wood planks to make a canvas.
- To create a painting: Use the canvas and any other items (such as an item that represents the painting you want) to craft the painting. The specific items required for each painting vary.
How to Display Minecraft Paintings
Once you have obtained your paintings, the next step is to display them properly in your builds. This section will provide a detailed guide on how to hang paintings on walls and some advanced tips for arranging them effectively.
Hanging a Painting: To hang a painting, you need a valid wall space. Here’s a step-by-step guide:
- Hold the painting in your hand.
- Look at an area on the wall where you want to hang the painting. It must be a flat, unobstructed wall space.
- Left-click the mouse button to place the painting on the wall. Ensure the space is large enough, typically one block wide by one block tall.
Renaming Paintings: It can be overwhelming to manage multiple paintings, especially if you’ve obtained several from villagers or chests. Here’s how to rename them:
- Place the painting on an anvil.
- Use a name tag to rename the painting with a unique and memorable name.
- This way, you can easily identify which painting is which without looking at the artwork directly.
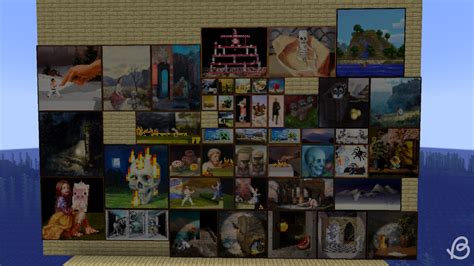
Arranging Paintings: For a more aesthetic and organized look, consider these tips for arranging your paintings:
- Grouping by Theme: Arrange paintings based on themes, such as historical art, nature scenes, or fantasy art. This will create a cohesive look.
- Using Symmetry: Arrange paintings symmetrically to create a balanced and visually appealing display. This involves placing equal numbers of paintings on either side of a focal point.
- Vertical vs. Horizontal: Alternate between vertical and horizontal painting orientations for a dynamic layout. Place larger paintings higher on the wall and smaller ones lower.
Practical FAQ
Can you trade paintings back to villagers?
Unfortunately, you cannot trade paintings back to villagers. Once you obtain a painting from a villager, it’s considered a unique item and cannot be used in trades again. This means you need to keep any paintings you receive as trades in your inventory or display them.
How can I organize my painting collection?
Organizing your painting collection can be achieved through several methods:
- Sort by categories, such as paintings that depict nature, fantasy, or historical figures.
- Group similarly themed paintings together, like all paintings of famous landmarks.
- Rename each painting using an anvil for easy identification, especially if you have many paintings.
- Use storage solutions like painting frames or storage units to keep your paintings organized.
What is the best way to display a large number of paintings?
Displaying a large number of paintings requires careful planning to ensure your walls don’t look cluttered:
- Start by selecting a few focal points in your build and arrange paintings around these points.
- Use different wall spaces to avoid overcrowding a single area.
- Consider using decorative pillars, columns, or other structural elements to hang paintings, especially for vertical displays.
- Experiment with different arrangements until you find a layout that looks appealing and makes efficient use of your wall space.
By following this guide, you’ll be able to obtain, display, and arrange Minecraft paintings effectively, enhancing the aesthetic appeal of your in-game builds and making the most out of this unique feature. Remember, practice makes perfect, so don’t hesitate to experiment with different methods and arrangements to find what works best for you.