Are you ready to explore the vast and vibrant world of Minecraft? Whether you’re starting a new adventure or looking to refresh your gameplay with a new perspective, choosing the right village seed can be a game-changer. The right seed can provide unique structures, resources, and challenges that make your experience more engaging and rewarding. Here’s your comprehensive guide to finding the best Minecraft village seeds that offer the most advantageous starting benefits.
Why Choose the Right Village Seed?
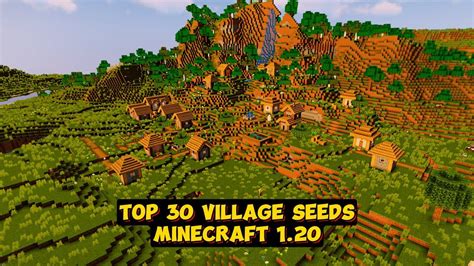
Choosing the right village seed in Minecraft is crucial for setting the tone of your adventure right from the start. Village seeds determine the location and type of initial structures you’ll find, which can significantly influence your resource availability, safety, and overall gameplay experience. A good village seed can offer features like easily accessible resources, nearby villages, and even unique biomes that add a whole new dimension to your gameplay.
Quick Reference
Quick Reference
- Immediate action item: Look for a village seed that places a village near important resources like forests or mountains.
- Essential tip: Use online community resources to find village seeds shared by other players that offer unique starting advantages.
- Common mistake to avoid: Ignoring the biome type around the village; a village near water sources may provide more fishing opportunities.
Detailed How-To Sections: Exploring Village Seeds
Step-by-Step Guide to Finding the Best Village Seeds
Finding the perfect village seed can set the stage for an amazing adventure in Minecraft. Here’s a step-by-step guide to help you select the best seeds based on your gameplay preferences.
1. Understand the Seed Functionality
A village seed in Minecraft is essentially a starting point for generating the terrain and structures you see. Each seed has unique coordinates that lead to distinctive landscapes, and when you generate a world with a village seed, it places a village near the defined coordinates.
2. Identify Your Goals
Think about what you want from your Minecraft experience. Do you want a village close to valuable resources? Perhaps you’re interested in a village near a biome that offers special resources like ocean ruins or jungle temples? Your goals will shape your choice of seeds.
3. Research Popular Village Seeds
There are many village seeds that players have shared over the years. Here are 12 popular village seeds renowned for their advantageous starting conditions:
| Seed Number | Description |
|---|---|
| 1643911313 | This seed places a village near a jungle and a mountain biome, providing plenty of wood and stone. |
| 5741879 | A village close to a forest biome, excellent for gathering wood and exploring nearby woodland mansions. |
| 836274989 | A village next to a desert biome, offering access to sand, clay, and potential temples. |
4. Test Different Seeds
Minecraft worlds are generated randomly based on the seed, so it’s a good idea to generate multiple worlds and test each one. Pay attention to the placement of the village relative to biomes, oceans, and other features.
5. Use Village Seed Generators
Online tools can help generate village seeds tailored to your preferences. These tools can filter seeds based on the proximity of villages to specific biomes, resource availability, and more.
6. Experiment with Custom Seeds
If you’re feeling adventurous, you can create custom seeds by combining features you want to see in your world. This requires a bit of Minecraft knowledge and experimentation but can lead to highly personalized starting conditions.
Maximizing the Benefits of Your Chosen Village Seed
Once you’ve found a village seed that meets your criteria, here’s how to make the most of it:
1. Explore the Surrounding Area
Immediately start exploring the area around the village. Take note of biomes like forests, mountains, deserts, and oceans as these will influence your resource gathering and exploration opportunities.
2. Establish a Base Near the Village
Build your first base near the village to have easy access to village resources like buildings and potentially valuable loot within village structures. This will also give you a safe starting point for your adventures.
3. Utilize Nearby Resources
Take advantage of the resources available in the biomes around your village. For example, if you’re near a forest, gather wood; if near a mountain, mine stone and ores. If near an ocean, set up a fishing area or look for shipwrecks.
4. Investigate Nearby Structures
Check for any nearby villages, temples, dungeons, or other structures that might offer additional resources or challenges. These can serve as additional points of interest and adventure.
Detailed How-To Sections: Advanced Tips for Minecraft Village Seeds
Advanced Tips for Enhancing Village Seed Benefits
Once you’re comfortable with the basics, here are some advanced tips to further enhance your village seed experience:
1. Utilize Seed Maps
Seed maps are detailed maps showing the layout of structures, biomes, and other features for a given seed. These can be incredibly useful for planning your exploration and resource gathering strategy.
2. Combining Seeds
Some players like to combine features from different seeds by starting with one seed and then spawning additional structures from another. This can provide a unique blend of resources and features.
3. Optimize Village Location
If your village seed places the village in a less-than-ideal location, consider using commands to move the village. This can give you better access to resources or move the village to a safer location.
4. Investigate Biome Influences
Each biome has its unique set of resources and features. Pay attention to the biome influences around your village to optimize your resource gathering. For example, snowy tundra biomes often have ice and snow, while desert biomes might have sand, clay, and potentially more dungeon structures.
5. Use Resource-Efficient Building Techniques
Efficient building techniques can help you make the most of your resources found near the village. For example, using slabs or stairs instead of full blocks can reduce your material usage, leaving more resources for other uses.
6. Plan for Long-Term Projects
Think ahead and plan your long-term projects based on the village seed. For instance, if your village is near a forest, plan a long-term woodcutting area. If near a beach, plan an extensive fishing operation or look for ocean ruins to explore.
Practical FAQ
Common user question about practical application
What if I don’t like the village placement in my chosen seed?
If you’re not happy with the village placement in a given seed, there are several solutions. You can use the command “/setblock” to move the village to a new location, though it might require some administrative knowledge in your game settings. Alternatively, you can simply generate a new world with a different seed until you find one that suits your needs. It’s important to note that moving villages via commands can sometimes cause issues with villager AI, so proceed with caution.
Common user question about exploring biomes
How do I efficiently explore new biomes in Minecraft?
Efficiently exploring new biomes in Minecraft starts with preparation. Make sure you have enough food, tools, and armor to handle whatever you might encounter. Carry torches or glowstone to light up dark areas, and bring plenty of water bottles or buckets if you’